Aluminum Trim Profile Specification for Solid Aluminium Cladding Facades Alloy Selection and Installation
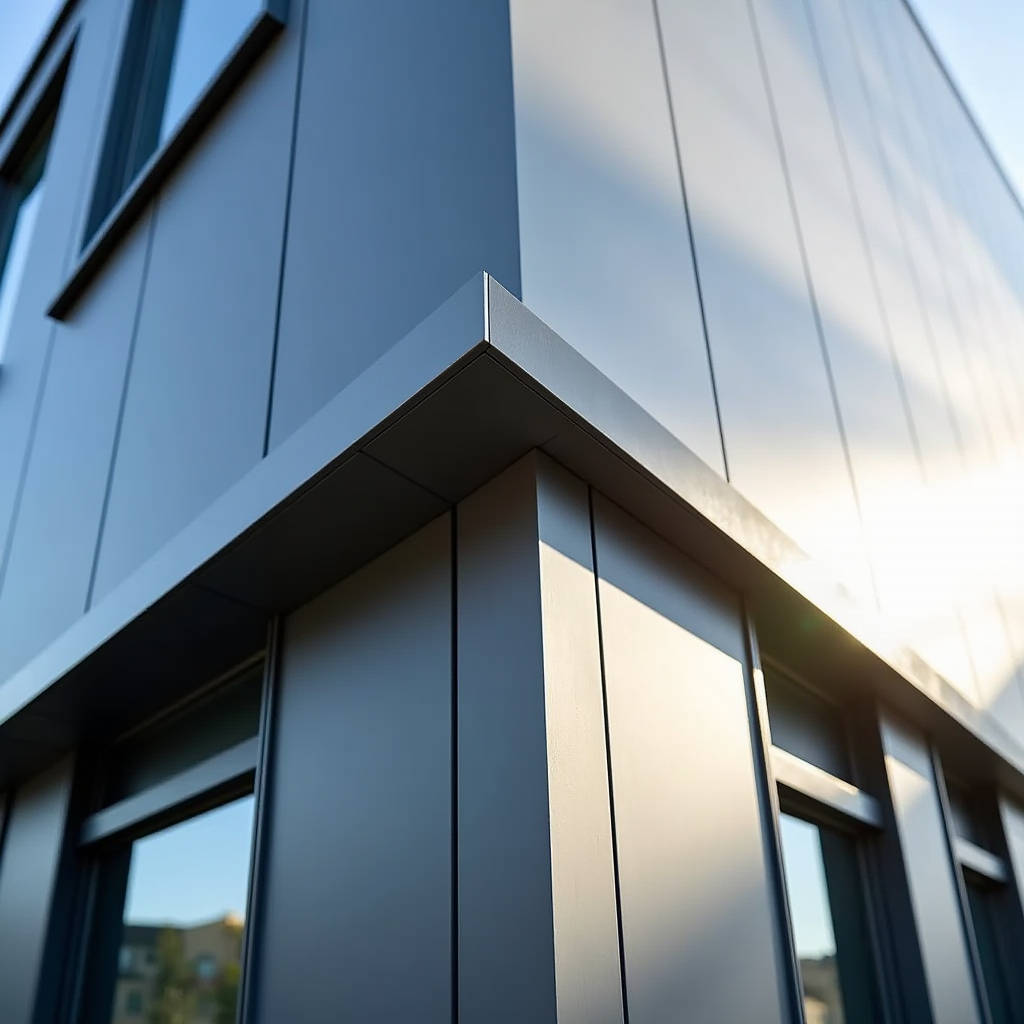
Specifying an Aluminum Trim Profile for a rainscreen facade or curtain wall interface is rarely as simple as pulling a stock extrusion from a catalog. On solid aluminium cladding panels—typically 2.0mm, 2.5mm, or 3.0mm thick sheets with PVDF or powder-coated finishes—the trim does more than conceal a raw edge. It manages differential thermal movement between the panel skin and the substructure, controls water ingress at horizontal and vertical joints, and defines the shadow line that gives a facade its visual rhythm. Architects often treat trim as an aesthetic afterthought; experienced facade engineers know that the wrong profile geometry, alloy selection, or attachment method will telegraph through the finished wall as oil-canning, coating delamination, or open-joint misalignment within the first 18 months of service. This article examines the extrusion alloys, profile families, coating compatibility, and installation tolerances that determine whether an Aluminum Trim Profile performs across a 30-year building lifecycle or becomes a punch-list liability.
Alloy Selection: Why 6063-T5 and 6063-T6 Dominate Architectural Trim
The Aluminum Trim Profile market splits roughly into two alloy camps: 6063 and 6061. For solid aluminium cladding applications, 6063-T5 and 6063-T6 account for the overwhelming majority of architectural trim extrusions. The reason is straightforward: 6063 offers a surface finish quality that 6061 cannot match after anodizing or painting, and its extrudability allows thinner, more complex hollow or semi-hollow shapes without tearing at the die.
6063-T5 delivers a tensile strength of approximately 150 MPa with yield strength around 110 MPa. That is sufficient for most non-structural trim applications—edge closures, window head flashings, and vertical joint cover profiles. Where the trim carries a modest structural load—such as a deep sill profile spanning 600mm between anchors—6063-T6 pushes tensile strength to roughly 205 MPa with yield at 170 MPa, providing an additional margin against deflection under wind load.
6061-T6, with tensile strength exceeding 260 MPa, enters the specification when the trim doubles as a structural stiffener or when project-specific seismic calculations demand higher strength. The trade-off is visible: 6061 extrusions show more die lines and surface grain, requiring heavier mechanical polishing before anodizing. For exposed architectural trim where the surface is viewed from 3 meters or less, 6063 remains the default choice. The cost differential between 6063-T5 and 6061-T6 trim profiles typically runs 12–18% on a per-linear-meter basis, driven by both billet cost and slower extrusion speeds.
Specifiers should also verify that the mill providing the extrusions holds an ISO 9001 certification and that the alloy chemistry conforms to Aluminum Association standards for 6063 composition. A heat number traceable to the mill certificate closes the loop on alloy verification.
Profile Families: Understanding the Functional Categories
Walk through any major commercial facade project and you will encounter four functional categories of Aluminum Trim Profile, each engineered for a specific joint condition on solid aluminium cladding systems.
Edge Closure and Perimeter Trim
These are the workhorses of any cladding package. Edge closure profiles cap the exposed perimeter of solid aluminium panels at window openings, parapet terminations, and building corners. The critical dimension is the throat depth—the distance from the visible face to the back of the panel pocket. For a 3.0mm thick solid aluminium panel, the throat must accommodate the panel thickness plus a 3–4mm clearance for thermal expansion and a continuous EPDM gasket. Underspecifying throat depth by even 1mm results in installers forcing panels into place, which scratches the PVDF coating and creates a corrosion initiation point.
Reveal and Shadow Line Profiles
Two-piece reveal systems, such as the EasyTrim Reveals concept, separate the trim into a mounting base channel and a snap-on face cap. This approach solves a persistent problem: how to fasten the trim to the substructure without visible screw heads. The base channel is screwed through slotted holes to the hat channel or grid system, then the face cap snaps over the fasteners. The reveal width—typically 10mm, 15mm, or 20mm—determines the shadow depth. Narrower reveals (10mm) read as a crisp line from street level; wider reveals (20mm) create a pronounced shadow that masks minor panel alignment deviations.
Z-Clip and Panel-to-Panel Transition Profiles
Where two solid aluminium panels meet in the same plane, Z-clip extrusions provide a hidden fastening solution. The Z geometry allows one leg to fasten to the substructure while the other leg engages a return flange on the panel edge. The profile must be designed with sufficient web thickness—typically 2.0mm minimum—to resist the pull-out forces generated by negative wind pressure. AAMA 508 provides a useful reference for determining allowable loads on clip-based attachment systems.
Corner and Angle Profiles
External and internal corner conditions demand profiles that can handle the geometric complexity of two intersecting planes. The most common failure mode here is mismatch between the profile's internal radius and the panel's bend radius. Solid aluminium panels brake-formed to a 90-degree corner will have a natural outside radius of approximately 1.5 to 2 times the material thickness. An angle trim with a sharper internal radius than the panel bend will not seat properly, leaving a gap that collects water and debris.
Coating Compatibility: PVDF, Powder, and Anodizing on Trim Profiles
The coating on an Aluminum Trim Profile must match the adjacent solid aluminium cladding panel in both chemistry and application method. Mismatched coating systems—a PVDF-coated panel next to a polyester powder-coated trim—will fade at different rates, creating a visible color shift within 3–5 years of UV exposure.
For high-end commercial facades, 70% PVDF (polyvinylidene fluoride) resin-based coatings dominate. Applied via spray coating to a minimum dry film thickness of 30–35 microns, PVDF offers the benchmark for color retention and chalk resistance. The relevant standard is AAMA 2605, which requires 10-year South Florida exposure testing with a maximum color change of 5 Delta E units.
Powder coating, governed by AAMA 2604, provides a more economical alternative with good performance for mid-rise and interior applications. The key specification detail: powder-coated trim profiles should receive a minimum 60-micron film thickness with a chromate conversion pretreatment. Without the pretreatment, filiform corrosion will propagate from any scratch or cut edge.
Anodized trim profiles present a different challenge. The anodizing process builds an aluminum oxide layer 15–25 microns thick (Class I architectural anodizing per AAMA 611). The oxide layer is integral to the aluminum surface, so it cannot delaminate like a paint film. However, anodized 6063 extrusions from different production batches can show noticeable color variation—a phenomenon known as "batch matching." Specifying that all anodized trim for a given elevation comes from a single billet heat and anodizing tank load minimizes this risk.
The following table summarizes the key performance parameters across the three coating systems for Aluminum Trim Profile applications:
| Parameter | PVDF (AAMA 2605) | Powder Coat (AAMA 2604) | Anodized (AAMA 611) |
|---|---|---|---|
| Minimum Film Thickness | 30–35 microns | 60 microns | 15–25 microns (AA-M15) |
| Color Retention (10 yr) | ≤ 5 Delta E | ≤ 7 Delta E | N/A (integral color) |
| Chalk Resistance | No. 8 minimum | No. 6 minimum | Not applicable |
| Impact Resistance | Excellent (flexible film) | Good | Poor (brittle oxide) |
| Field Repair Feasibility | Moderate (touch-up pen) | Moderate | Difficult |
| Relative Cost per Linear Meter | 100% (baseline) | 65–75% | 80–90% |
| Typical Lead Time Addition | +10–14 days | +5–7 days | +7–14 days |
Thermal Movement: The Engineering Detail That Separates Good Trim from Failed Trim
Aluminum expands at approximately 23.4 × 10⁻⁶ per degree Celsius. For a 4-meter-long Aluminum Trim Profile spanning a continuous facade elevation, a temperature swing from -10°C (winter night) to +60°C (summer sun on a dark-colored panel) produces a length change of roughly 6.6mm. Installers who butt trim profiles tightly together at 20°C ambient temperature will see the joints close completely in summer heat and open to unsightly gaps in winter cold.
The correct engineering approach specifies expansion joints at intervals determined by the expected temperature range and the profile's cross-sectional stiffness. A general rule: for dark-colored PVDF trim (solar reflectance index below 30), provide a 6mm expansion gap every 3.0 meters. For light-colored or anodized trim, a 6mm gap every 4.0 meters is usually adequate. The gap should be filled with a low-modulus silicone sealant that can accommodate ±50% joint movement without adhesive failure.
Slotted fastening holes in the trim's mounting flange are equally important. A 6mm diameter screw through a 7mm × 10mm slotted hole allows the trim to slide longitudinally relative to the substructure. Fixed anchor points—typically at the midpoint of each trim length—prevent the profile from walking in one direction over repeated thermal cycles. The ASTM E228 standard provides the coefficient of thermal expansion testing methodology that underpins these calculations.
Attachment Methods: Fasteners, Adhesives, and Structural Tape
The method used to attach an Aluminum Trim Profile to the substructure affects both the installed appearance and the long-term durability of the entire cladding assembly. Three attachment strategies dominate current practice.
Mechanical Fastening
Stainless steel screws—Type 304 or 316 in coastal environments—remain the most common attachment method. The screws must be isolated from the aluminum trim by a nylon or EPDM washer to prevent galvanic corrosion. The fastener spacing calculation follows the same wind load analysis used for the cladding panels themselves, typically referencing ASCE 7-16 for design wind pressures. In practice, fastener spacing for trim profiles ranges from 300mm on-center in high-wind zones to 600mm on-center in sheltered locations.
Structural Adhesive Bonding
Two-part acrylic and polyurethane adhesives are gaining traction for trim attachment where visible fasteners are unacceptable. The adhesive must be tested for peel strength on both the aluminum trim substrate and the panel finish. A minimum peel strength of 35 N/25mm (per ASTM D903) is a reasonable specification threshold. The limiting factor is surface preparation: the bond area on both the trim and the panel must be abraded and solvent-wiped within 4 hours of adhesive application.
Double-Sided Structural Tape
For interior trim applications and lightweight exterior profiles, acrylic foam tapes (such as 3M VHB structural glazing tapes) offer a fast, clean installation method. The tape's viscoelastic properties also provide a degree of vibration damping and thermal movement accommodation. However, tape-bonded trim should not be used as the sole attachment for profiles exceeding 1.5 kg per linear meter or for any application where the trim serves as a safety-critical retention component.
Quality Control: What to Inspect Before Trim Leaves the Factory
A thorough incoming QC protocol for Aluminum Trim Profile shipments catches problems before they reach the scaffold. The inspection checklist should cover at minimum:
- Dimensional verification: Check wall thickness, web height, flange width, and overall length against the approved shop drawing. A digital caliper with 0.01mm resolution is the minimum acceptable instrument.
- Straightness: Place a 2-meter length of trim on a granite surface plate. Maximum allowable bow is 1.5mm per 2 meters for exposed architectural trim.
- Coating thickness: Use a calibrated eddy-current gauge to measure dry film thickness at 5 points per linear meter. All readings must fall within the manufacturer's specified range.
- Color match: Compare the trim against the approved color swatch and the actual cladding panel under both D65 daylight and horizon light sources. A Delta E of 1.0 or less is achievable with modern PVDF coating lines and should be the acceptance criterion.
- Anodize seal quality: For anodized trim, the modified dye stain test (ASTM B136) verifies that the anodic oxide pores are properly sealed. An improperly sealed anodized surface will absorb stains and corrode prematurely.
Suppliers like Futeng® that operate integrated extrusion and coating lines can maintain tighter process control across these parameters than operations that outsource finishing to third-party applicators. The single-point responsibility reduces the finger-pointing that often accompanies coating adhesion failures.
Installation Sequencing: Why Trim Should Never Be an Afterthought
On too many project sites, the Aluminum Trim Profile arrives in a box that nobody opens until the cladding panels are already hung. This sequence guarantees problems. Trim installation should be integrated into the facade contractor's workflow from the earliest stages of the enclosure.
The recommended sequence: install vertical trim profiles first, working from the building corners inward. This establishes the alignment grid for the entire elevation. Horizontal trim—window heads, sills, and floor-line profiles—follows, with shims used to correct any accumulated tolerance stack from the structural frame. Only after the trim grid is verified for plumb, level, and alignment should the solid aluminium cladding panels be hung.
This sequence also allows the trim to serve as a temporary alignment reference. Laser scanning the installed trim grid before panel installation provides a digital record of the as-built geometry. Any deviation exceeding 3mm from the design plane can be corrected with shim packs before the panels obscure the substructure.
The AAMA TIR-A9 technical information report provides guidance on field tolerances for metal curtain wall components, including trim and accessory profiles. The document recommends a maximum 1.5mm offset between adjacent trim lengths and a maximum 3mm deviation from a 3-meter straightedge for exposed trim surfaces.
Cost Drivers: What Actually Moves the Price of Architectural Trim
Procurement managers evaluating Aluminum Trim Profile quotations should understand the four primary cost drivers beyond the raw aluminum billet price:
- Die complexity: A simple L-angle profile requires a flat-face die costing $800–$1,200. A hollow two-piece snap-together reveal system requires a more complex porthole or bridge die, costing $2,500–$4,000. For custom profiles, the die cost is amortized across the project quantity—on a 500-linear-meter order, a $3,000 die adds $6.00 per meter.
- Coating specification: AAMA 2605 PVDF adds approximately 25–35% to the finished trim cost compared to AAMA 2604 powder coating. The premium reflects both the higher material cost of PVDF resin and the more stringent application controls.
- Length optimization: Trim profiles are typically extruded in 6-meter or 7.2-meter lengths and cut to project-specific dimensions. Ordering lengths that maximize the number of pieces per extrusion billet reduces the cost per linear meter by minimizing drop waste.
- Packaging and protection: Architectural trim with a Class A finish requires individual polyethylene sleeving or interleaving with foam separators. Crating for export shipments adds $3–$8 per linear meter depending on profile complexity and destination.
For a typical mid-rise commercial project with 2,000 linear meters of custom PVDF-coated 6063-T5 trim, the budget should anticipate $28–$45 per linear meter delivered, excluding installation labor. Standard stock profiles from catalogs like those offered by Extrude-A-Trim or Eagle Aluminum can reduce the unit cost to $12–$22 per linear meter, but only if the project geometry accepts standard dimensions without modification.
Specifying Trim for Solid Aluminium Cladding: A Practical Checklist
The difference between a facade that reads as a cohesive architectural surface and one that looks like a collection of mismatched parts often comes down to the trim specification. Based on the engineering principles discussed above, the following checklist captures the essential specification points for any Aluminum Trim Profile on a solid aluminium cladding project:
- Alloy: 6063-T5 for non-structural, 6063-T6 for moderate load, 6061-T6 for structural applications. Mill cert required.
- Profile geometry: Verify throat depth accommodates panel thickness plus 3–4mm clearance. Internal radii must match panel bend radii.
- Coating: Match adjacent panel chemistry. AAMA 2605 PVDF, AAMA 2604 powder, or AAMA 611 anodized. Specify batch consistency requirements.
- Thermal movement: Calculate expected expansion. Provide slotted holes and expansion joints per the project temperature range.
- Fasteners: Stainless steel with isolation washers. Spacing per wind load calculations.
- QC: Dimensional, straightness, coating thickness, and color match inspection at incoming receipt.
- Installation sequence: Vertical trim first, horizontal second, panels last. Laser verify before panel installation.
Getting the trim right requires engineering discipline, not just aesthetic judgment. When the wind blows, the sun heats the facade, and the building settles into its foundations, the Aluminum Trim Profile is the component that either accommodates those forces gracefully or telegraphs them as cracks, gaps, and corrosion. The specification decisions made at the drawing board stage determine which outcome the building owner lives with for the next three decades.