Aluminum Shear Block Engineering and Selection for Curtain Wall and Storefront Systems
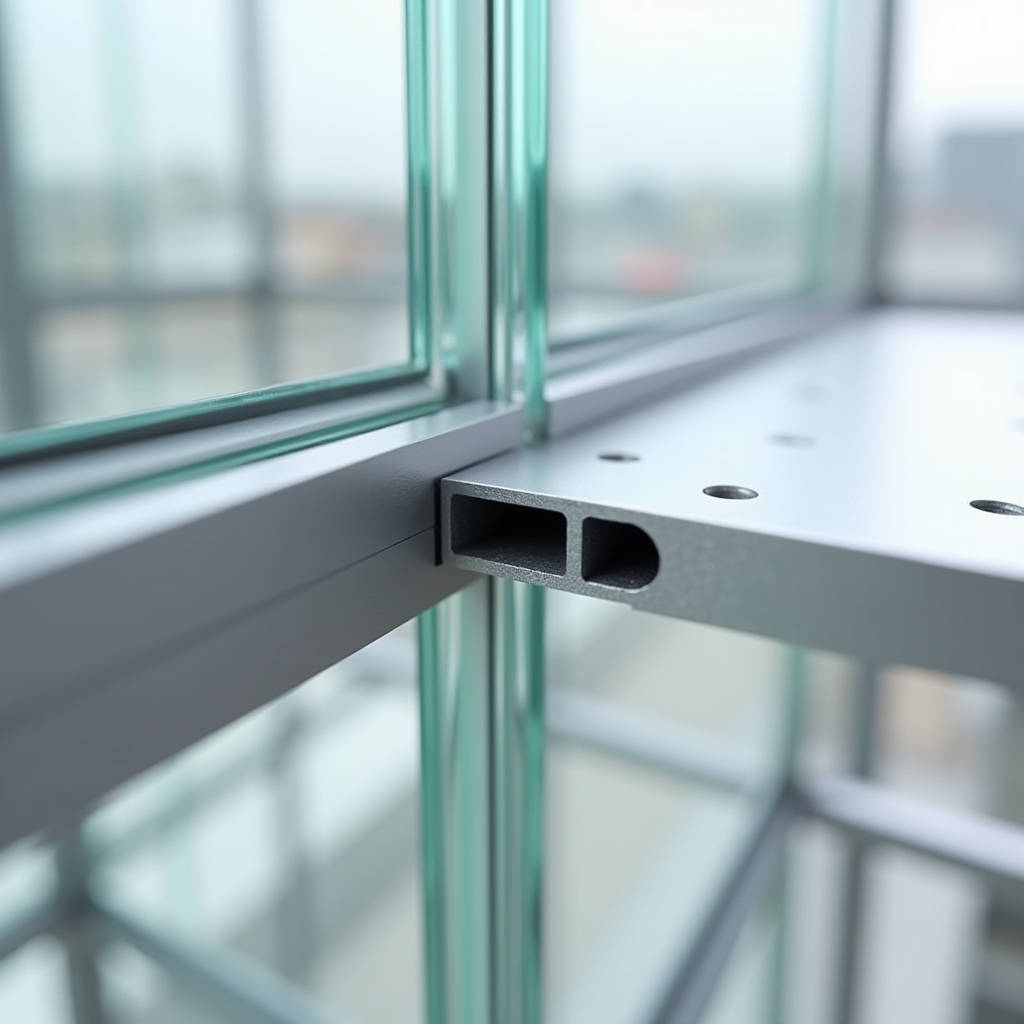
When a curtain wall contractor opens a box of shear blocks on site, the first thing they check is not the spec sheet. It is whether the extrusion profile actually matches the mullion. An Aluminum Shear Block is one of those components that never makes it into the architectural renderings, yet it carries the dead load of glass panels, transfers wind pressure from horizontal mullions into vertical structural members, and determines whether a storefront or window wall system stays square after a decade of thermal cycling. The shear block sits at the intersection of two aluminum framing members, resisting both vertical shear forces and torsional moments that would otherwise cause the horizontal to rotate under load. Getting the alloy, the screw pattern, and the bearing surface right matters more than most people in procurement realize.
What an Aluminum Shear Block Actually Does in a Framing System
In stick-built curtain wall and storefront assemblies, horizontal mullions (also called transoms or rails) must connect to vertical mullions in a way that transfers loads without deforming either member. An Aluminum Shear Block is a precisely machined or extruded component that slides into the cavity of the horizontal mullion and fastens to the vertical mullion with screws or bolts. The block provides a positive mechanical bearing surface. When wind hits the facade, the horizontal mullion wants to deflect and twist. The shear block resists that rotation by engaging the internal geometry of the horizontal extrusion. Without it, the only thing holding the horizontal in place would be the screw in shear, which is a failure mode no engineer wants to see.
The block also handles differential thermal movement. Aluminum expands and contracts roughly 0.0128 mm per meter per degree Celsius. Over a 3-meter horizontal span with a 50°C temperature swing, that is nearly 2 mm of movement. A properly designed shear block allows the horizontal to slide slightly within its pocket while maintaining structural engagement. This is why the clearance between the block and the extrusion cavity is not arbitrary. Too tight, and thermal stress builds up. Too loose, and you get rattling, water infiltration, and eventual fatigue cracking at the screw holes.
Alloy Selection: Why 6063-T6 and 6061-T6 Dominate
Walk through any aluminum extrusion plant and you will see two alloys dominating the architectural hardware space: 6063-T6 and 6061-T6. For shear blocks, the choice between them is not trivial. 6063-T6 offers better extrudability, which means tighter tolerances and more complex cross-sectional profiles. It has a minimum tensile strength of 207 MPa and yield strength around 172 MPa. 6061-T6 brings higher strength, with tensile strength around 310 MPa and yield strength of 276 MPa, but it is harder to extrude into thin-walled, intricate shapes.
Most commercial shear blocks from suppliers like U.S. Aluminum and FHC use 6063-T6 because the block geometry often requires thin fins, ribs, or interlocking features that 6061 would tear during extrusion. However, for high-load applications, particularly in blast-resistant facades or areas with hurricane-level wind loads, 6061-T6 shear blocks become necessary. The trade-off is cost. 6061-T6 shear blocks typically cost 25-40% more than equivalent 6063-T6 parts due to slower extrusion speeds, higher die wear, and more frequent die replacement.
For solid aluminum cladding panel projects that incorporate integrated window wall or storefront systems, the shear block alloy must be compatible with the mullion alloy to avoid galvanic corrosion. Mixing 6061 blocks with 6063 mullions is generally acceptable because both are 6xxx series alloys with similar electrochemical potentials. But mixing with 7xxx series or with steel fasteners without proper isolation requires careful review. The AAMA 2604 and 2605 standards for organic coatings on architectural aluminum also apply to shear blocks if they are visible or exposed to weather, though most shear blocks remain hidden inside the mullion cavity.
Load Path Analysis: From Glass to Anchor
Understanding the load path is essential for anyone specifying or purchasing shear blocks. The sequence runs as follows: wind pressure hits the glass, the glass transfers load to the horizontal mullion via setting blocks and gaskets, the horizontal mullion transfers both shear and moment to the shear block, the shear block transfers load to the vertical mullion through the screw group, and the vertical mullion transfers everything to the anchor at the floor slab.
At the shear block connection, three failure modes must be checked. First, block bearing failure: the aluminum block itself can crush or deform under the concentrated load from the horizontal mullion web. Second, screw shear failure: the fasteners connecting the block to the vertical mullion can shear off. Third, tear-out failure: the screw holes in the vertical mullion can elongate and tear. A properly engineered shear block balances all three so that no single failure mode governs prematurely.
For a typical storefront with 2.5-meter horizontal spans and 1.2-meter glass lite heights, the shear load at each block connection might be on the order of 2-4 kN under design wind pressure of 1.5 kPa. That does not sound like much, but it is a cyclic load repeated thousands of times over the life of the building. Fatigue matters. This is why shear blocks with mill finish are common in interior conditions, but for exterior or high-humidity environments, anodized or PVDF-coated blocks provide better long-term performance against corrosion pitting, which can initiate fatigue cracks.
Installation Reality: What the Shop Drawings Do Not Tell You
The gap between engineering intent and field reality is where shear block problems multiply. On paper, the shear block slides into the horizontal, two Tek screws go through pre-drilled holes into the vertical, and the connection is complete. On site, the installer discovers that the horizontal extrusion has a slight bow from the anodizing bath, the shear block does not seat fully, and the screw holes do not align. The fix is usually a hammer, which introduces residual stress and mars the anodized surface.
One of the most common field issues involves the Accufab Pro Shear Block Positioning System. This system requires specific Tek screws, catalog number 12X212HHDTEK, because the thread geometry and drill point are matched to the positioning jig. Using a generic self-drilling screw from the site toolbox results in over-driven or under-driven fasteners, which compromises the bearing contact between the shear block and the mullion. The result is a connection that is either too loose (allowing movement and noise) or too tight (restraining thermal expansion and causing mullion bowing).
Another field reality is that shear blocks are often installed in the wrong orientation. Many blocks are asymmetrical, with a specific top and bottom face. Installing one upside down changes the bearing surface geometry and can reduce the block's load capacity by 30% or more. This is not always caught during inspection because the connection is hidden once the horizontal is fully seated.
For solid aluminum cladding panel projects, Futeng® has observed that contractors who pre-assemble shear blocks onto vertical mullions in a controlled shop environment, rather than on the swing stage, consistently achieve better alignment and fewer warranty claims. The controlled environment allows for torque-controlled screw installation and proper application of isolation tape between dissimilar metals.
Thermal Performance and Condensation Risk
Shear blocks create a thermal bridge. The block is solid aluminum, which has a thermal conductivity of roughly 160 W/m·K. When it connects an exterior horizontal mullion to an interior vertical mullion, it provides a direct conductive path for heat to bypass the thermal break. In cold climates, this can drop the interior surface temperature of the mullion below the dew point, leading to condensation inside the building.
The thermal door shear blocks from FHC (ZK004TK) address this partially by using a reduced cross-section and incorporating a thermal strut design, but the fundamental problem remains. For high-performance building envelopes targeting Passive House or similar standards, the shear block connection must be detailed with a thermal isolator pad between the block and the vertical mullion. This pad, typically a 1-2 mm thick glass-reinforced nylon or polyamide material, reduces the thermal bridge by a factor of 100 or more compared to direct aluminum-to-aluminum contact.
The table below summarizes the thermal conductivity impact of different shear block connection details:
| Connection Detail | Effective Thermal Conductivity (W/m·K) | Condensation Risk (Cold Climate) | Relative Cost |
|---|---|---|---|
| Direct aluminum-to-aluminum | ~160 | High | Baseline |
| With 1mm nylon isolator pad | ~1.5 | Low | +8% |
| With 2mm polyamide isolator | ~0.8 | Minimal | +12% |
| Thermally broken block (proprietary) | ~2.0-3.0 | Moderate | +25-35% |
Shear Blocks in Solid Aluminum Cladding Panel Integration
When solid aluminum cladding panels are integrated with storefront or window wall systems, the shear block plays a secondary but important role. The cladding panels themselves are typically mounted on a separate subframe system using aluminum angles, clips, and brackets. However, at the interface between the cladding and the glazing system, the shear block connection can influence the overall facade deflection behavior.
If the cladding subframe is rigidly tied to the window wall mullions, and the shear block connections have some degree of slop, differential movement between the cladding and the glazing can cause sealant joint failure. The fix is to allow independent movement of the cladding system relative to the window wall, with the shear blocks handling only the glazing system loads. This separation of movement joints is a detail that experienced facade engineers specify early in the design development phase, but it is often overlooked in design-build projects where the cladding and glazing packages are procured separately.
For 2.0mm, 2.5mm, and 3.0mm solid aluminum panels with PVDF coatings (typically 25-35 microns dry film thickness per AAMA 2605), the panel attachment system uses its own shear connections at the clip-to-subframe interface. These are not the same as mullion shear blocks, but the engineering principles are identical: provide a positive bearing surface, allow for thermal movement, and avoid relying on fasteners in shear alone.
Quality Control: What to Inspect Before Signing the Delivery Ticket
Procurement managers and site supervisors should inspect shear blocks upon delivery with the same rigor they apply to glass and aluminum extrusions. The following checklist covers the critical items:
- Dimensional tolerance: Measure the overall length, width, and thickness of a sample from each box. Tolerance should be within ±0.25 mm for critical bearing surfaces. Use calipers, not a tape measure.
- Screw hole alignment: Place the shear block against the vertical mullion it is designed to mate with. The screw holes should align without forcing. Misalignment greater than 0.5 mm indicates a die problem at the extrusion plant.
- Surface finish: For anodized blocks, check for consistent color and absence of die lines deeper than 0.05 mm. For mill finish blocks, check for oxidation spots, especially if the blocks have been in inventory for more than six months.
- Burr removal: Run a finger along all edges. Any sharp burr is unacceptable. Burrs prevent proper seating and can score the interior of the horizontal mullion during installation.
- Alloy verification: If the project specification requires 6061-T6, request mill test reports. Some suppliers have been known to substitute 6063-T6, which is visually identical but structurally different.
The AAMA provides guidelines for aluminum extrusions in architectural applications, and the ASTM B221 standard covers the specification for aluminum alloy extruded bars, rods, wire, profiles, and tubes. Shear blocks should conform to these standards as a minimum baseline.
Common Specification Mistakes
Over years of reviewing shop drawings and submittals, several recurring specification errors stand out. The first is specifying the shear block by the horizontal mullion series number without verifying the year or revision of the system. U.S. Aluminum, for example, has revised their OG213 and 4-inch horizontal systems over the decades, and shear blocks from a 1990s catalog may not fit extrusions produced in 2023. The AP213 shear block is designed for the current OG213 system, but older OG213 extrusions may have different internal geometry.
The second mistake is specifying shear blocks without accounting for the screw type. The CRL AP213, AP954, and AP431 shear blocks all come with screws included, but the screw type varies by application. The AP954 shear block for intermediate horizontals requires specific Tek screws when used with the Accufab Pro system. Specifying the wrong screw or assuming the installer will use whatever is on hand leads to connections that do not meet the tested assembly performance.
The third mistake is ordering shear blocks in the wrong quantity. Shear blocks are typically sold in packs of 20, and each horizontal-to-vertical connection requires two blocks (one at each end of the horizontal). A 10-meter-wide storefront with horizontals at 1.5-meter spacing has approximately 7 horizontal members, requiring 14 shear blocks. But you also need blocks for sill connections, top rail connections, and any intermediate horizontals. Under-ordering by even one pack can delay a project by days while waiting for shipping.
The National Glass Association (NGA) publishes technical manuals that include guidance on storefront and curtain wall connection design, and the Fenestration and Glazing Industry Alliance (FGIA) offers training and certification programs that cover shear block installation best practices.
Cost Factors Beyond the Unit Price
The unit price of a shear block, typically between $0.80 and $3.50 depending on size, alloy, and finish, is almost irrelevant compared to the cost of getting it wrong. A failed shear block connection discovered during field water testing means removing glass, disassembling the horizontal, replacing the block, reassembling, and re-testing. The labor cost of that rework can exceed the cost of the shear blocks for the entire project by a factor of 10 or more.
More significantly, shear block failures that go undetected until after occupancy manifest as sagging horizontals, cracked glass from uneven bearing, water leaks at mullion intersections, and in extreme cases, glass panels falling out of the opening. The liability exposure is enormous. This is why experienced contractors do not shop for shear blocks on price alone. They buy from suppliers who provide consistent extrusion quality, include the correct fasteners, and maintain traceability back to the mill heat number.
For international projects, the logistics cost of shear blocks deserves attention. A box of 20 shear blocks weighs roughly 2-4 kg, so air freight is feasible for urgent orders. But for large projects requiring 500 or more blocks, sea freight becomes the economical choice, and the 4-6 week lead time must be factored into the construction schedule. Some manufacturers, including Futeng®, offer consolidated shipping where shear blocks are packed with the aluminum cladding panel shipment, reducing overall freight costs.
Maintenance and Long-Term Durability
Shear blocks are hidden components, which means they are never inspected after installation. The building owner will not see them. The facility manager will not think about them. They must perform without attention for the 50-year design life of the facade. This places a premium on material quality and corrosion resistance at the time of installation.
In coastal environments, salt spray can penetrate the mullion cavity through weep holes and drainage paths. Mill finish aluminum shear blocks in these conditions will develop white corrosion products (aluminum oxide) that can expand and create pressure between the block and the mullion, potentially cracking the extrusion. Anodized blocks (Class I, per AAMA 611) provide significantly better corrosion resistance. For the most aggressive environments, PVDF-coated blocks offer the best protection, though the coating thickness must be controlled to avoid interfering with the fit tolerance.
The screw connection is another long-term concern. Carbon steel Tek screws in contact with aluminum create a galvanic cell in the presence of moisture. The zinc plating on the screw provides sacrificial protection, but once the zinc is consumed, the steel screw corrodes rapidly and can fail. Stainless steel screws (300 series) eliminate this problem but cost more and require careful torque control to avoid stripping the aluminum. The extra cost of stainless fasteners, typically $0.10-0.20 per screw, is negligible compared to the cost of a single connection failure.
Making the Right Choice for Your Project
Selecting the correct Aluminum Shear Block comes down to matching the block to the specific mullion system, verifying the alloy and finish against the project environmental conditions, and ensuring the fasteners are compatible with both the block and the installation method. The lowest-bid shear block that "looks about right" is a false economy that has cost contractors far more than they saved. For solid aluminum cladding panel projects that incorporate glazing systems, the shear block is a small component that deserves the same level of engineering attention as the panels themselves. When the wind blows and the building stands firm, nobody thinks about the shear blocks. That is exactly the point.