Aluminum Shadowline Trim Engineering the Reveal Joint for Solid Aluminium Cladding Facades
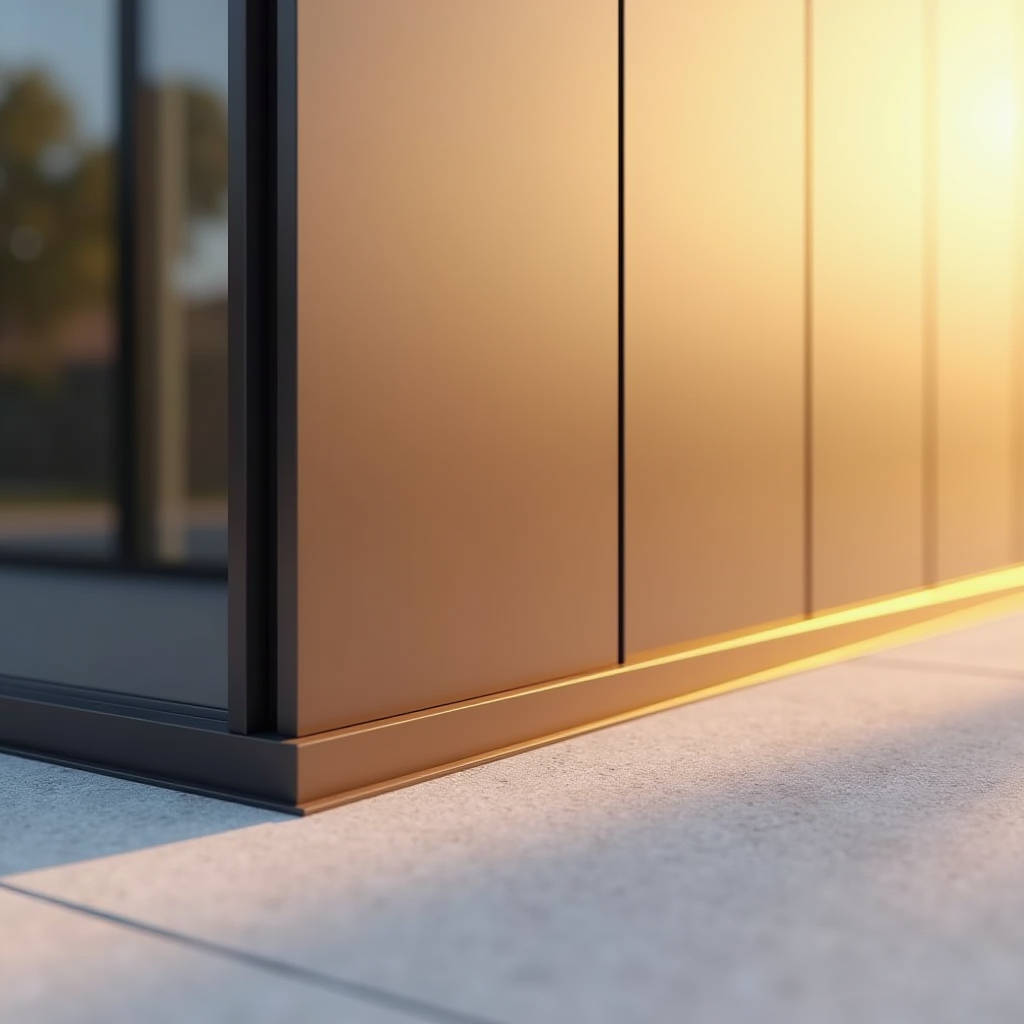
When a building envelope fails at the joints, the post-mortem rarely points to the panel itself. The culprit is almost always the transition — the place where metal meets glass, where cladding terminates against a window frame, or where the base of a wall hovers above the ground plane. Aluminum Shadowline Trim exists precisely to solve this problem. It is not decorative molding. It is a precision-engineered architectural extrusion that creates a controlled negative space — a recessed reveal that separates two surface planes with a crisp, consistent gap. For solid aluminium cladding panel systems, the shadowline trim functions as the critical interface between the 2.0mm, 2.5mm, or 3.0mm panel edge and the adjacent building element. The reveal depth, typically ranging from 6mm to 20mm, generates a shadow that masks minor installation tolerances while giving the facade a deliberate, machined appearance. Architects specify it. Contractors wrestle with it. And when it is done wrong, everyone notices.
What Separates Architectural Shadowline Trim from Standard Extrusions
Walk through any commercial district and you will see buildings where the cladding joints look tired — sealant smeared, gaps uneven, panel edges warping under thermal stress. These failures often trace back to one decision: the project team treated the trim as an afterthought rather than an engineered component. Architectural-grade Aluminum Shadowline Trim differs from off-the-shelf aluminum angles in three fundamental ways.
First, the alloy. Standard hardware-store extrusions commonly use 6060 or 6063 alloys with T5 temper, which are adequate for interior millwork but lack the mechanical properties required for exterior facade service. Proper shadowline trim for solid aluminium cladding applications uses 6063-T6 or, in high-stress applications, 6005A-T6 alloy. The T6 heat treatment delivers a minimum tensile strength of 215 MPa compared to T5's 150 MPa, which matters when a 3-meter length of trim must remain dead straight under direct sun on a 40°C afternoon.
Second, the geometry. A true shadowline extrusion is not a simple L-angle. It incorporates a return leg, a drainage channel, a sealant pocket, and a precisely calculated reveal depth. The 3/16-inch (4.8mm) reveal offered by systems like the Shadowline series from Wall Panel Systems represents the narrow end of the spectrum, while 1/2-inch (12.7mm) and larger reveals are common for base-of-wall applications where the visual shadow needs to read from a distance. The Tamlyn Base Shadow Line product, for instance, uses a ridged face specifically designed to receive tape and float compound when the trim interfaces with drywall above a floating floor detail.
Third, the finish. Mill-finish aluminum — the raw, uncoated state — has no place on an exterior facade. It oxidizes unevenly, picks up handling marks, and develops a chalky appearance within months. Architectural shadowline trim must carry the same coating specification as the adjacent cladding panels. For PVDF (polyvinylidene fluoride) coatings conforming to AAMA 2605, the minimum dry film thickness is 30 microns across a three-coat system (primer, color coat, clear coat). For anodized finishes, the architectural Class I designation under AA-M10C22A31 requires a minimum oxide thickness of 18 microns. The TRE aluminium shadowline skirting line from Australia demonstrates this principle with its 15-micron anodized layer, though that product is positioned for interior high-traffic zones rather than full exterior exposure.
The Engineering Reality Behind the Reveal
Here is something the renderings never show: a shadowline reveal is a water management device masquerading as an aesthetic detail. The recessed gap between the cladding panel and the trim creates a capillary break. Water that sheets down the panel face cannot bridge the gap — surface tension breaks at the sharp edge, and the droplet falls into the drainage channel behind the trim rather than wicking into the joint. This is not theory. It is the same principle that makes a drip edge on a roof effective.
The depth-to-width ratio of the reveal matters. A 6mm-deep reveal with a 10mm gap performs differently than a 10mm-deep reveal with the same gap width. The deeper the reveal relative to the opening, the more effective the capillary break, but also the more visible any installation misalignment becomes. Most facade engineers settle on a ratio between 1:1 and 2:1 (depth to width) for exterior applications. The 1/4-inch (6.4mm) Tektrim Z Metal Head & Jamb profile, used around windows and doors in drywall assemblies, operates at the shallow end of this range and works because it is sheltered by the window head.
Thermal movement is the other silent variable. Aluminum expands at approximately 0.000023 meters per meter per degree Celsius. A 3-meter length of trim subjected to a 60°C temperature swing (from -10°C winter night to 50°C summer sun) will grow by roughly 4.1mm. If the trim is rigidly fixed at both ends without accommodation for this movement, it will buckle. The fix is straightforward: slotted holes at one end, a minimum 5mm gap at butt joints between lengths, and — critically — never relying on sealant alone to absorb movement. Sealant can handle ±25% joint movement at best. For a 4mm expansion, that means a minimum 16mm sealant joint width, which is visually unacceptable in a shadowline detail. The correct approach is to let the trim slide at its fixings and keep the sealant joint as a weather seal, not a structural one.
Material Compatibility and Galvanic Corrosion
Put aluminum trim against galvanized steel framing in the presence of moisture, and you have built a battery. The aluminum becomes the anode and sacrifices itself. This is galvanic corrosion, and it is entirely preventable — yet it appears on project after project because someone skipped the isolation detail.
The galvanic series places aluminum at approximately -0.85V (versus a saturated calomel electrode), while zinc (galvanized coating) sits at about -1.03V, and carbon steel at -0.65V. The potential difference between aluminum and carbon steel is roughly 0.2V, which is enough to drive corrosion in a wet environment. The fix is a physical barrier: a PVC or EPDM isolation tape between the aluminum trim and any dissimilar metal substrate. Stainless steel fasteners (304 or 316 grade) are mandatory. The ISO 9223 corrosion classification for the project site should dictate the fastener grade — C3 environments (urban/industrial) can use 304, but C4 and above (coastal, high-pollution) demand 316.
This is where specifying the trim from the same supplier as the cladding panels becomes operationally sensible. When a contractor sources solid aluminium panels from a manufacturer like Futeng®, the trim extrusions can be ordered with the identical PVDF coating batch, the same alloy specification, and a pre-applied isolation layer. The alternative — sourcing trim from a separate extrusion house — introduces coordination risk: mismatched color, different alloy, no isolation prep, and finger-pointing when corrosion appears.
Installation Sequencing That Prevents Rework
Shadowline trim is unforgiving of installation sequence errors. The trim must be set before the cladding panels, not after. This sounds obvious, but on a chaotic site where the cladding contractor is pushing to close the building, the temptation to hang panels first and "slip the trim in later" is real. It never works. The panel edges obscure the trim fastening flange, and the resulting install looks like a patch job.
The correct sequence:
- Verify substrate flatness. A ±3mm deviation over 3 meters is the maximum acceptable tolerance for shadowline trim installation. Anything worse will telegraph through the trim as a visible wave.
- Install isolation tape or membrane on the substrate where the trim will bear.
- Set the trim using a laser level. A spirit level is not sufficient for runs longer than 2 meters. The human eye can detect a 1mm deviation over a 1-meter shadowline reveal.
- Fix the trim at 400mm centers maximum, using slotted holes at one end of each length. The TRE skirting product uses pre-drilled holes at 400mm intervals — this is a practical standard derived from the stiffness of typical aluminum extrusions in the 1.5mm to 2.5mm wall thickness range.
- Install the cladding panels, maintaining the specified reveal gap with plastic shims if necessary.
- Apply sealant last, after all panels are fixed and the reveal gap is consistent. Tool the sealant to a concave profile — this allows the sealant to stretch and compress without tearing at the bond line.
A common failure mode: the installer fixes the trim at both ends of a 3-meter length with no slot, then the sun hits the dark-colored panel. The trim buckles outward between fixings. The fix is to remove the trim, slot the holes, and reinstall — a half-day of rework that could have been avoided with a 30-second slotting operation during fabrication.
Coating Performance Data for Exterior Shadowline Trim
Not all coatings are equal, and the shadowline trim — sitting in a recessed joint where water can linger — is a particularly harsh service environment. The table below summarizes the key performance parameters for the three coating systems commonly specified for exterior aluminum trim.
| Coating System | Standard | DFT (microns) | Pencil Hardness | Salt Spray Resistance | UV Resistance (ΔE) | Typical Service Life |
|---|---|---|---|---|---|---|
| PVDF (70% Kynar) | AAMA 2605 | 30-35 (3-coat) | HB-F | 4,000 hrs (ASTM B117) | <5 after 10 yrs Florida | 25-30 years |
| Polyester (Super Durable) | AAMA 2604 | 25-30 (2-coat) | F-H | 2,000 hrs | <8 after 5 yrs Florida | 10-15 years |
| Anodized (Class I) | AA-M10C22A31 | 18+ (oxide layer) | N/A (hard anodize: 60-70 HRC) | 1,000 hrs | Color-dependent; dark tones fade | 15-20 years (interior); 10-15 exterior |
The data tells a clear story: for exterior shadowline trim on a building expected to perform for 25+ years without recoating, PVDF to AAMA 2605 is the only defensible specification. The cost difference between AAMA 2604 polyester and AAMA 2605 PVDF on trim material is typically $8-15 per linear meter, which on a project with 500 linear meters of trim amounts to $4,000-$7,500 — a rounding error in the context of a facade package worth hundreds of thousands of dollars. The cost of recoating or replacing failed trim five years in will be ten times that figure.
Shadowline Trim at the Base of Wall: The Floating Detail
The base-of-wall condition is where shadowline trim delivers its most dramatic architectural effect — and where it is most vulnerable to abuse. The concept is simple: a recessed aluminum trim at the junction of the wall cladding and the floor creates the illusion that the wall hovers above the ground. The shadow masks the joint between the flooring material and the wall base. Tamlyn's Base Shadow Line and EZ Concept's AluBase products both address this condition, with the former designed for tape-and-float integration with drywall and the latter targeting a flush finish with the wall surface.
For solid aluminium cladding panels at the base of an exterior wall, the shadowline trim must perform three functions simultaneously: it must provide a visually clean termination, it must protect the bottom edge of the panel from mechanical damage (kicked by feet, hit by cleaning equipment), and it must allow water that has drained down the cavity behind the panel to exit freely. This last point is frequently overlooked. A base trim that seals tightly against the panel bottom traps water in the cavity, leading to corrosion, freeze-thaw damage, and — in cold climates — ice jacking that can pry the panel off its fixings. The correct detail includes a 6mm minimum drainage gap, ideally formed by the trim profile itself as a continuous slot rather than intermittent weep holes that clog with debris.
The height of the base shadowline trim above finished floor level is a design decision, but it is constrained by practical limits. Less than 20mm and the shadow effect is lost; the gap reads as a construction defect rather than an intentional reveal. More than 50mm and the gap becomes a toe-catcher and a debris trap. The sweet spot is 25mm to 35mm, which provides a readable shadow while keeping the gap small enough to discourage curious fingers and litter accumulation.
Custom Extrusions Versus Standard Profiles
Tektrim and other manufacturers openly advertise custom extrusion capabilities, and for good reason. A signature architectural detail — a particular reveal depth, a specific return leg geometry, a unique drainage channel — can become a building's visual calling card. Custom dies typically cost between $2,500 and $8,000 depending on the profile complexity and the extrusion press size. The minimum production run is usually 500 to 1,000 kilograms of aluminum, which at typical trim weights of 0.3 to 1.5 kg per linear meter translates to anywhere from 300 to 3,000 linear meters.
The decision to go custom should be driven by project scale. For a small commercial building with 200 linear meters of trim, the die cost amortized over the project adds $12.50 to $40 per meter — steep but potentially justifiable if the detail is central to the design. For a large project with 2,000+ linear meters, the die cost drops to $1.25 to $4 per meter, at which point custom becomes economically neutral compared to standard profiles.
What architects should not do is design a custom extrusion that duplicates a standard profile with a 1mm dimensional tweak. The shadowline trim market has matured to the point where standard profiles cover the vast majority of reveal depths, leg lengths, and drainage configurations. The ME TRIM Shadowline Series, with its 24 finish options coordinated to tap, tile, and grout colors, illustrates how a well-designed standard range can satisfy most design requirements without the lead time and cost of custom tooling. Before commissioning a custom die, request samples of standard profiles from at least three suppliers. The profile you need probably already exists.
Quality Control Checks During Fabrication
The trim arrives on site in boxes. It looks straight. It looks clean. The installer assumes it is ready to go. This assumption is wrong often enough to justify a 20-minute incoming inspection protocol.
Check the straightness first. Place a 3-meter length on a flat surface and measure the maximum deviation from a straight edge. The Aluminum Association standard for extruded bar, rod, and shapes permits a bow of 1mm per 300mm of length. For a 3-meter trim, that is 10mm, which is far too much for a shadowline reveal that must read as perfectly straight. Reject anything with more than 3mm of bow over 3 meters.
Check the coating thickness with a calibrated digital gauge. Take readings at five points along the length and average them. The average must meet the specified DFT; no single reading should fall below 80% of the specified minimum. Pay particular attention to the inside corners of the profile — these are the areas where electrostatic spray application struggles to achieve full coverage, and they are precisely the areas that will be exposed to standing water in service.
Check the cut ends. Factory-cut ends should be square within 1 degree and deburred. Burrs on the cut edge will prevent proper butt-joint alignment and create a visible gap in the shadowline. If the trim was cut on site with a chop saw, the cut face must be touched up with the specified coating repair system. Anodized trim cannot be touched up effectively — the repair will always be visible — so anodized trim should be factory-cut to length whenever possible.
Specifying Aluminum Shadowline Trim for International Projects
For procurement managers sourcing solid aluminium cladding systems across borders, the shadowline trim specification requires careful attention to regional standards equivalency. A project designed to Australian AS/NZS standards may reference a trim profile that is not directly available from a Chinese or Middle Eastern extrusion mill. The key is to specify by performance rather than by proprietary product name.
The specification should include: alloy and temper (e.g., 6063-T6 per ASTM B221), coating system and standard (e.g., PVDF to AAMA 2605), reveal dimensions with tolerances (±0.5mm), wall thickness (minimum 1.5mm for structural profiles, 2.0mm preferred for base-of-wall applications subject to impact), and fastener type and spacing. This performance-based approach allows the contractor to source from multiple qualified suppliers while maintaining the design intent.
Lead time is the other international consideration. Standard profile trim from a well-organized supplier can ship in 4-6 weeks from order confirmation. Custom extrusions add 4-6 weeks for die fabrication and trial runs. For a project on a tight schedule, the die cost is not the constraint — the time is. The project team should lock the trim specification early and place the order before the cladding panels, because the trim must be on site first.
The shadowline trim is a small component by weight and cost, typically accounting for 3-7% of the total facade package budget. But it carries disproportionate visual and functional responsibility. It is the line that the eye follows across the building. It is the detail that keeps water out of the cavity. It is the termination that tells the observer whether the building was built with care or with haste. Treat it accordingly.